
 Email
Email
 Like
Like
 Tweet
Tweet
Skirts were commonly worn by women during the 1940s as part of a suit (or costume, as it was known) or paired with blouses, jumpers and twin sets. Austerity regulations dictated that manufactured skirts could have a maximum of six seams, one pocket, three buttons and two inverted- or four knife-pleats. Hems could be no more than 3” (7.5cm) deep and zips were prohibited, as metal was redirected to war production. The silhouette was heavily influenced by the limitations and skirts were cut fairly slim over the hips and generally A-line, with the hem finishing just below the knee. Skirts were typically made from wool, linen and rayon in plain, stripe and check fabrics; red, brown, green, blue, black,navy and grey were all popular color choices.
1940s Vintage Style Skirt (Free Sewing Pattern)
Step 1

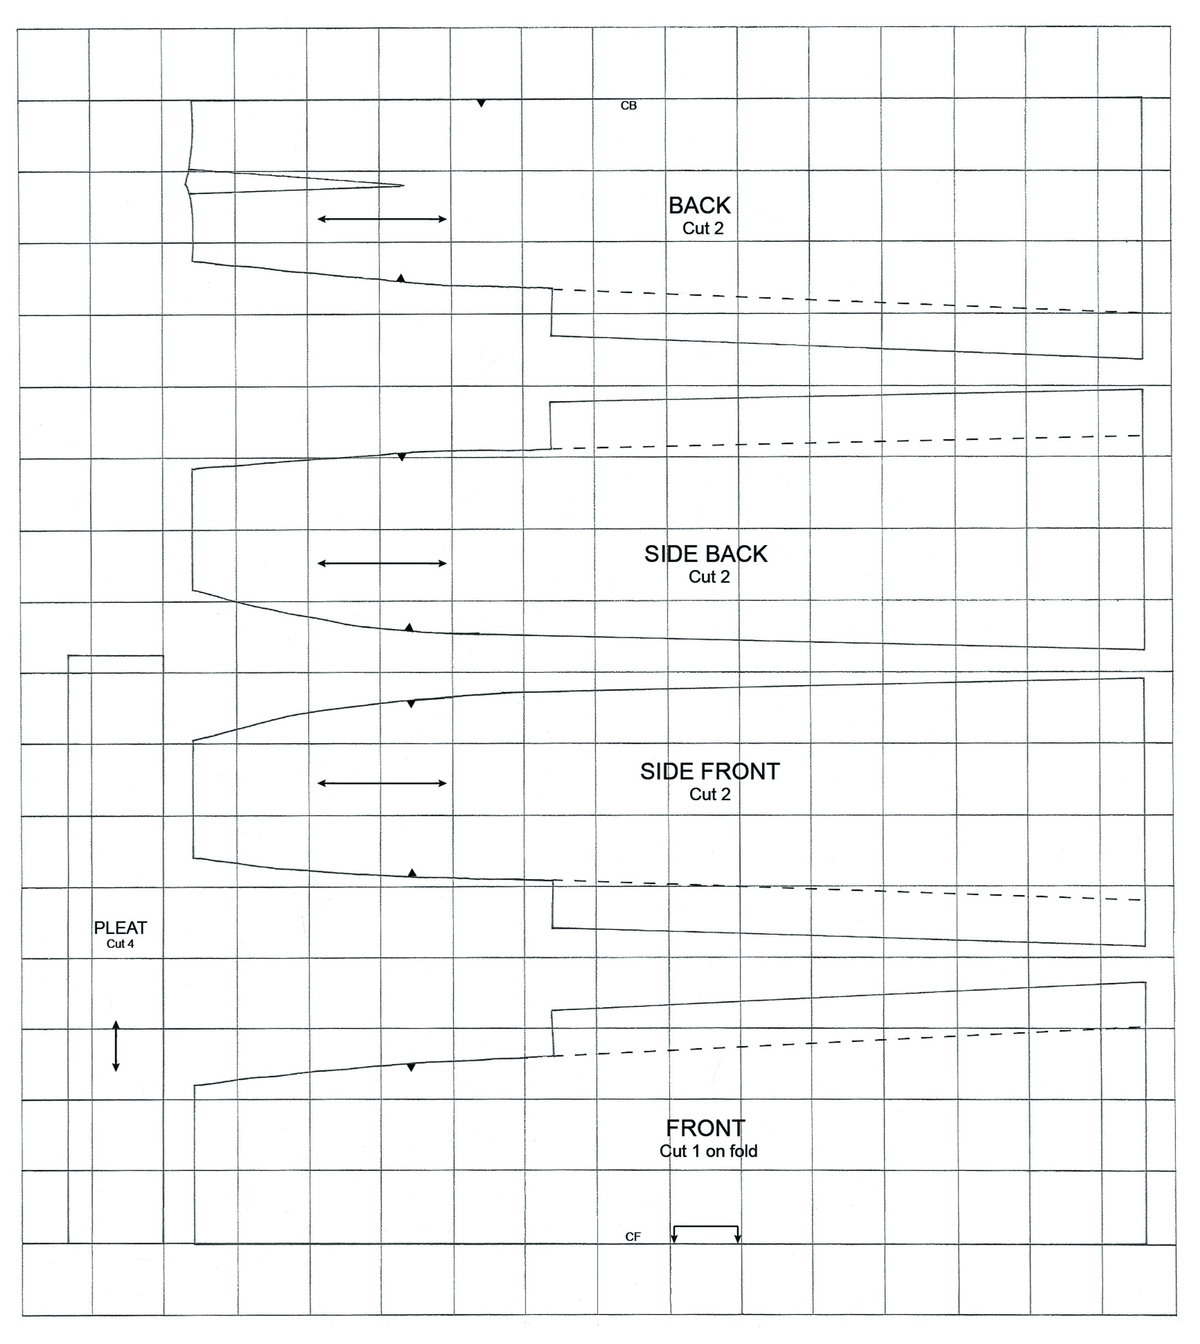
MAKING THE SKIRT
Suitable Fabrics: Wool suiting, wool crêpe, cotton drill, corduroy, linen or any medium weight woven fabric
Method
Enlarging the Pattern
The pattern does not include seam allowance.
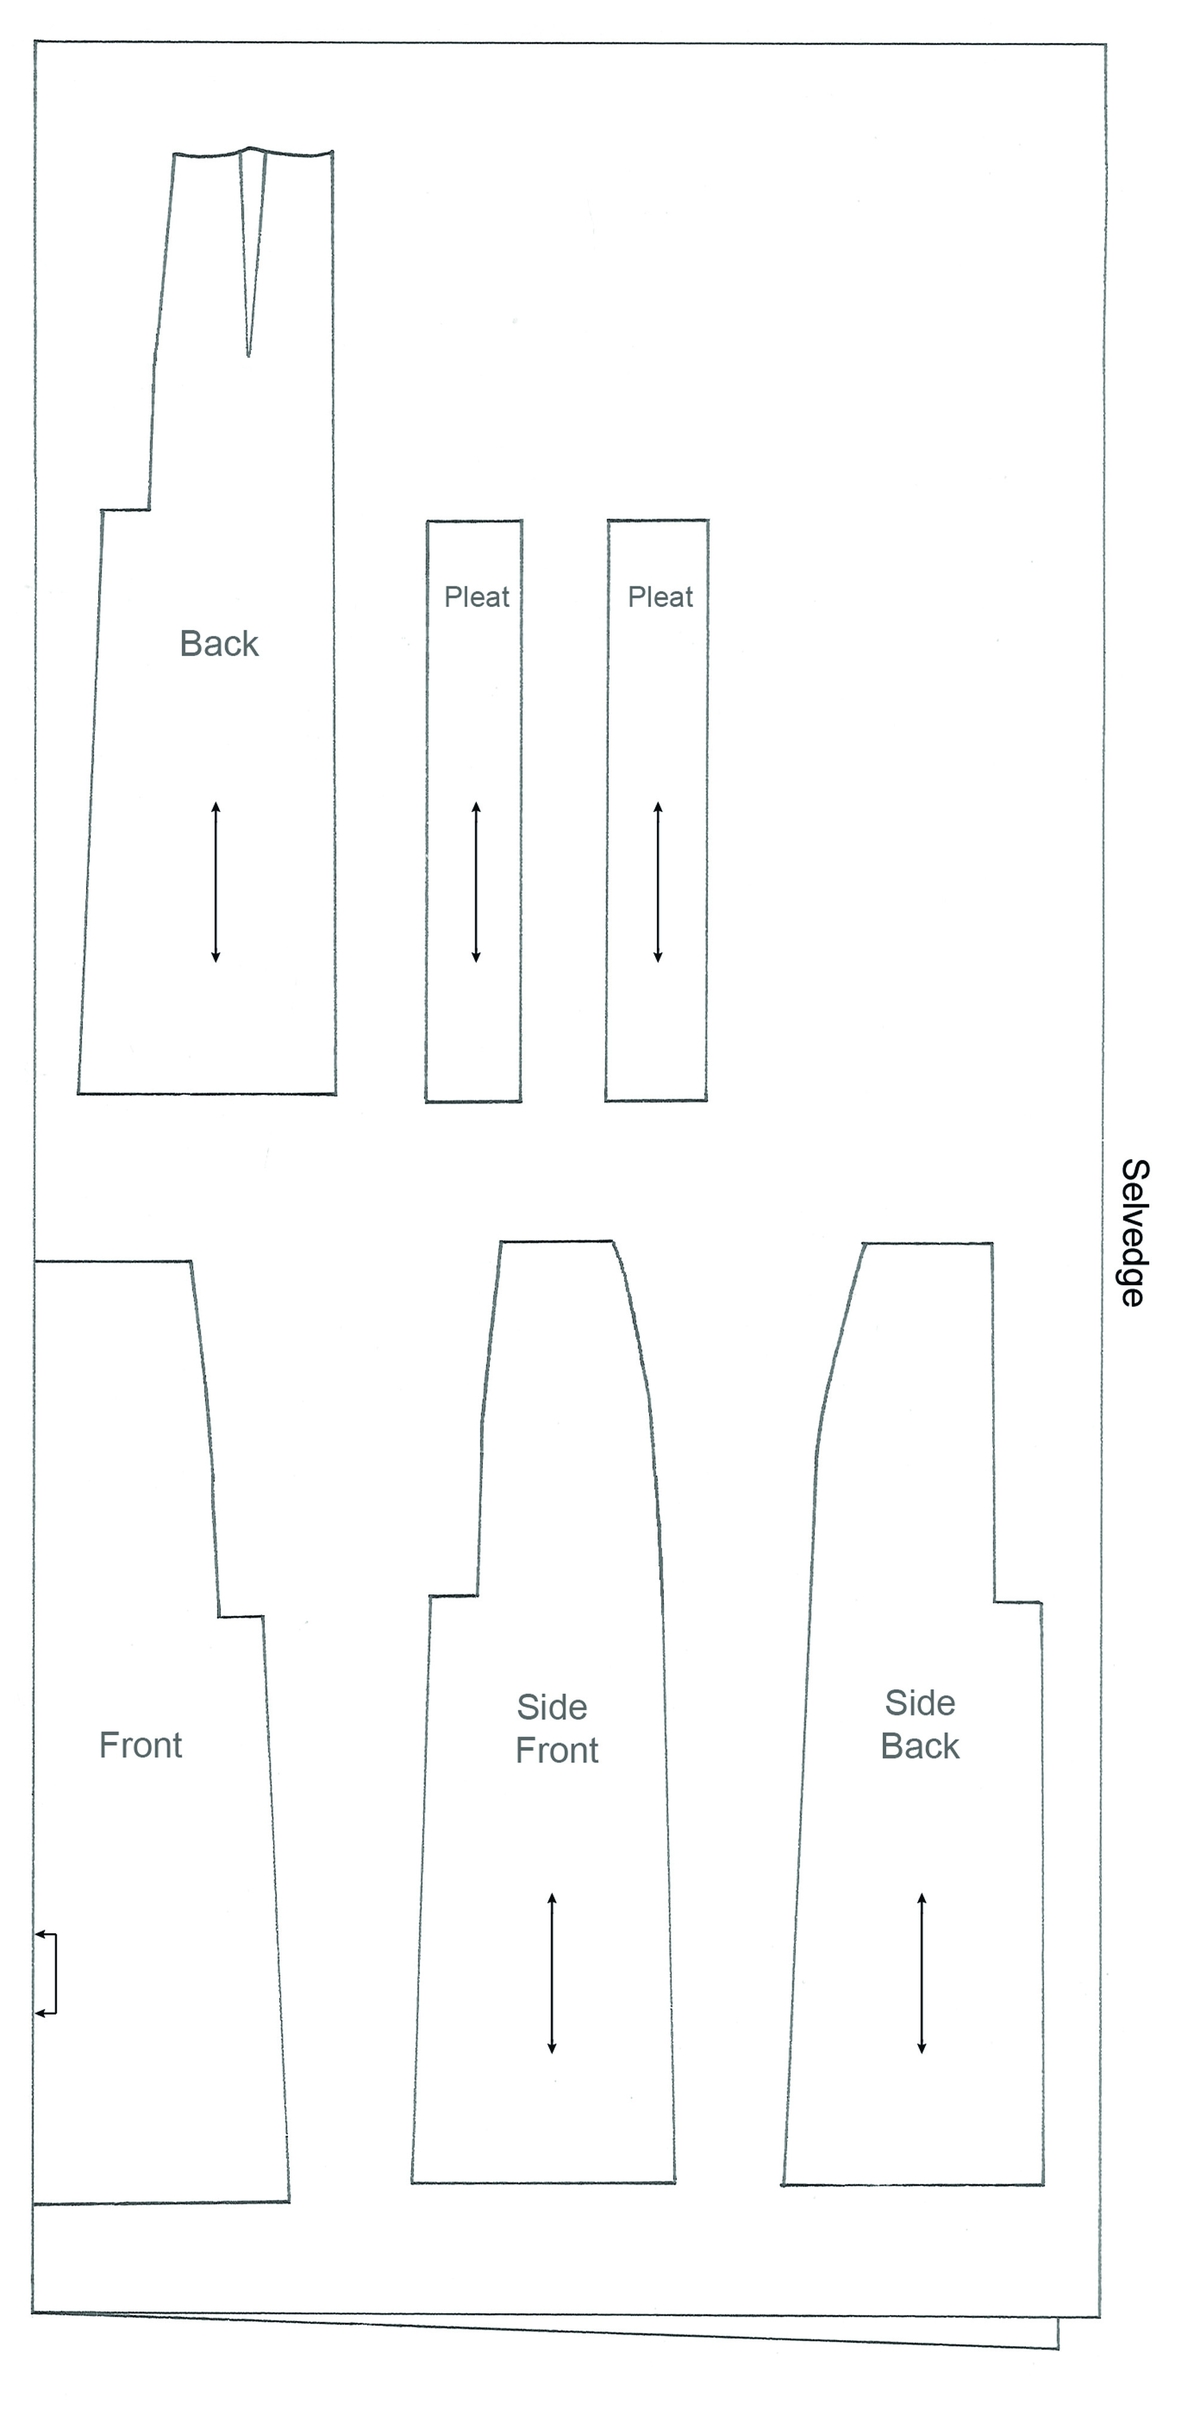
Cutting Out
Begin by selecting the lay plan for your chosen fabric. Arrange the pattern on your fabric as shown, ensuring you leave enough space around each piece to add seam and hem allowance directly onto the fabric. Take note of the straight-of-grain and place-on-fold markings. You will need to use the pleat pattern twice. Pin the patterns to the fabric, add the seam and hem allowance onto the fabric in chalk and cut out.
MATERIALS
1.6m of 1.5m-wide fabric or
1.75 m of 1.15m-wide fabric 50cm lightweight fusible interfacing
4 small press studs
2 small hooks and eyes
2m of 10mm bias binding
A small amount of silk habutaior lining fabric (for the placket)
Matching thread
Tacking thread
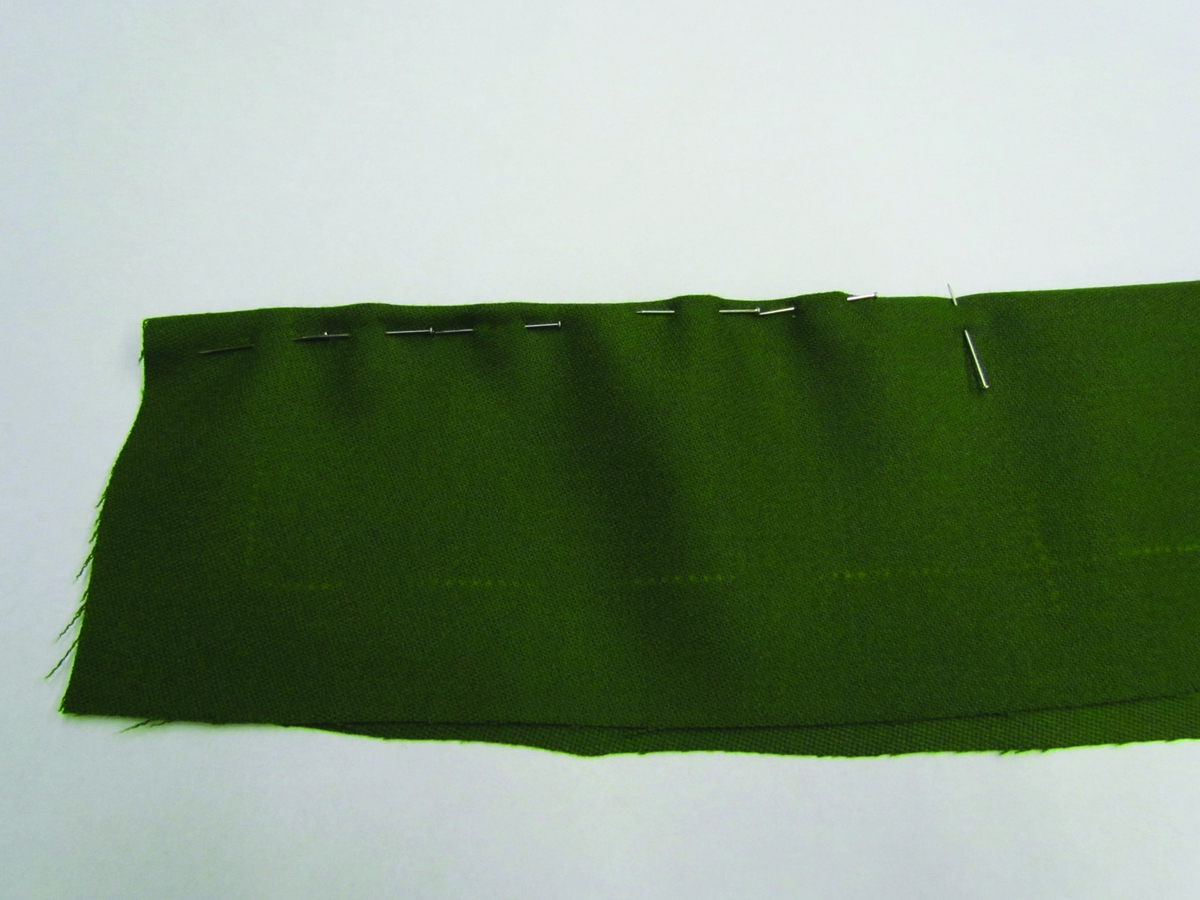
Step 2


Transfer all pattern markings and seam lines using tailor tacking. This includes the waistline, the darts, the center back opening, the pleats, pleat extensions and hemline.
Step 3

If you are using a particularly slippery fabric, you may wish to interface the pleats to prevent them from losing their shape.
Step 4


You will need to cut out four pieces of fusible interfacing using the pleat pattern and then fuse these to the back of the fabric pieces. You do not need to include seam or hem allowance when using the interfacing, as this will add bulk to the seams.
Step 5

The side back skirt pieces have darts to provide a smooth fit. Match the tacking of each dart on the wrong side of the fabric, pinning in place.
Step 6

Machine the darts, starting on the waistline and stitching off the end of the point for a few stitches. Back stitch on the waistline, but not at the point, as this will prevent the dart from sitting smoothly. Press the stitches into the fabric, then press the darts towards the center back, using a tailor’s ham. Press the darts on the right side of the fabric, using a pressing cloth to avoid scorching the fabric if necessary. If the fabric is particularly bulky the darts will create a lump. The darts can be snipped open instead and pressed evenly either side of the stitching line.
Step 7


Back and Front Pleats
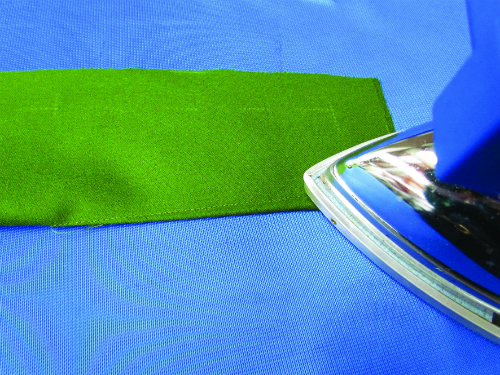
Note: if you are using a very bulky fabric, you may wish to use the alternative hem method at the end of the chapter, which you will need to complete before this step. To make the pleats, begin by pressing the extensions on the front,side front, back, and side back pieces to the wrong side of the fabric on the tacked lines.
Step 8

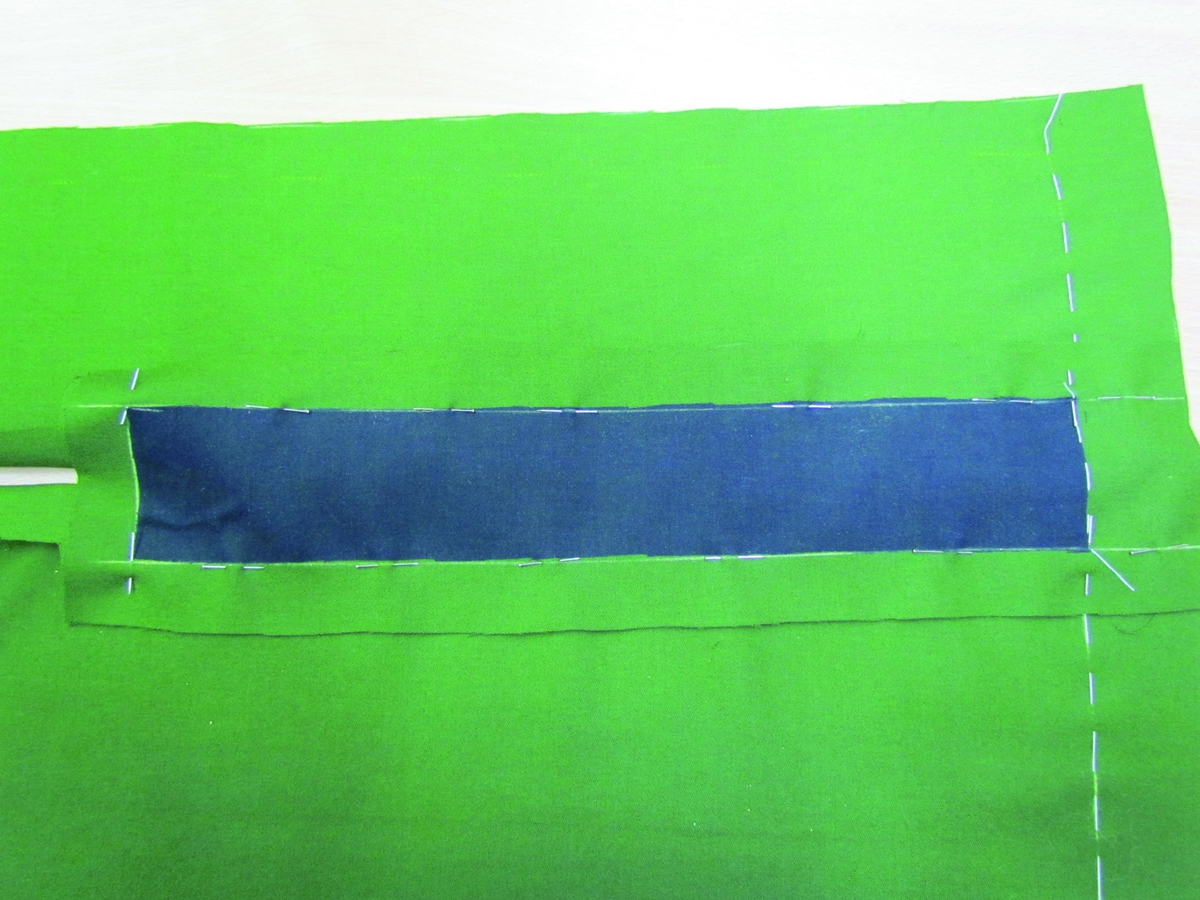
For the front pleats, match a pleat piece to each side of the extension on the front panel and then match thepleats to the side front panels. Machine the seam lines together.
Step 9

Match the front and side front panel seam lines above the pleats. Machine together then press the seam allowance open and the pleats flat. Tack the creased edges of each pleat Together.
Step 10


Darts
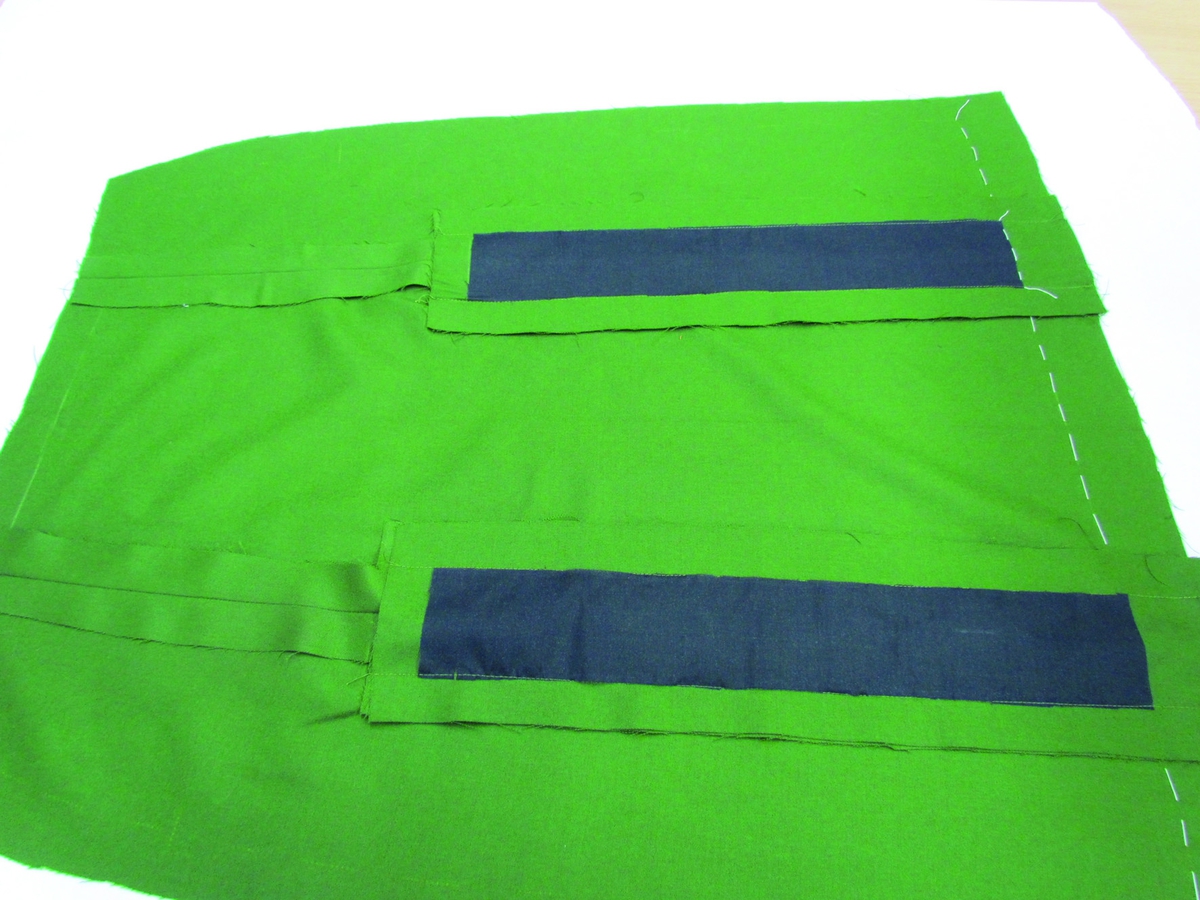
Join the side back pieces to the back pieces using the same process. Match the center back pieces and machine up to the placket placement (where the skirt will open). Snip into the seam allowance where the stitching ends and press the seam open. Match the side seams together,machine stitch and press the seam open. To neaten the raw edges, pinking is effective on woolen fabrics: use pinking shears to pink the edges of the seam allowance down to 1.5cm.
Step 11


Zig-zag stitch can be used to neaten the raw edges of the pleats on the inside of the skirt.
Step 12

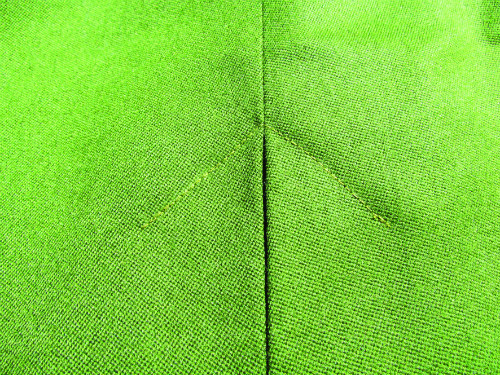
Arrowheads
The top of each pleat needs to besecured to help retain the shape and keep the pleats in place. Arrowheads can be worked by machine or by hand to add detail. Ensure the pleats are tacked together, then tack inverted V shapes at the top of each pleat. Working from the right side of the skirt,machine stitch on the tacking lines,pivoting at the point and backstitching at either end.
Step 13
If the pleats drop out of the fabric easily, the edge of each pleat can be top stitched 2–3mm from the edge to help retain the shape.
Step 14


Placket
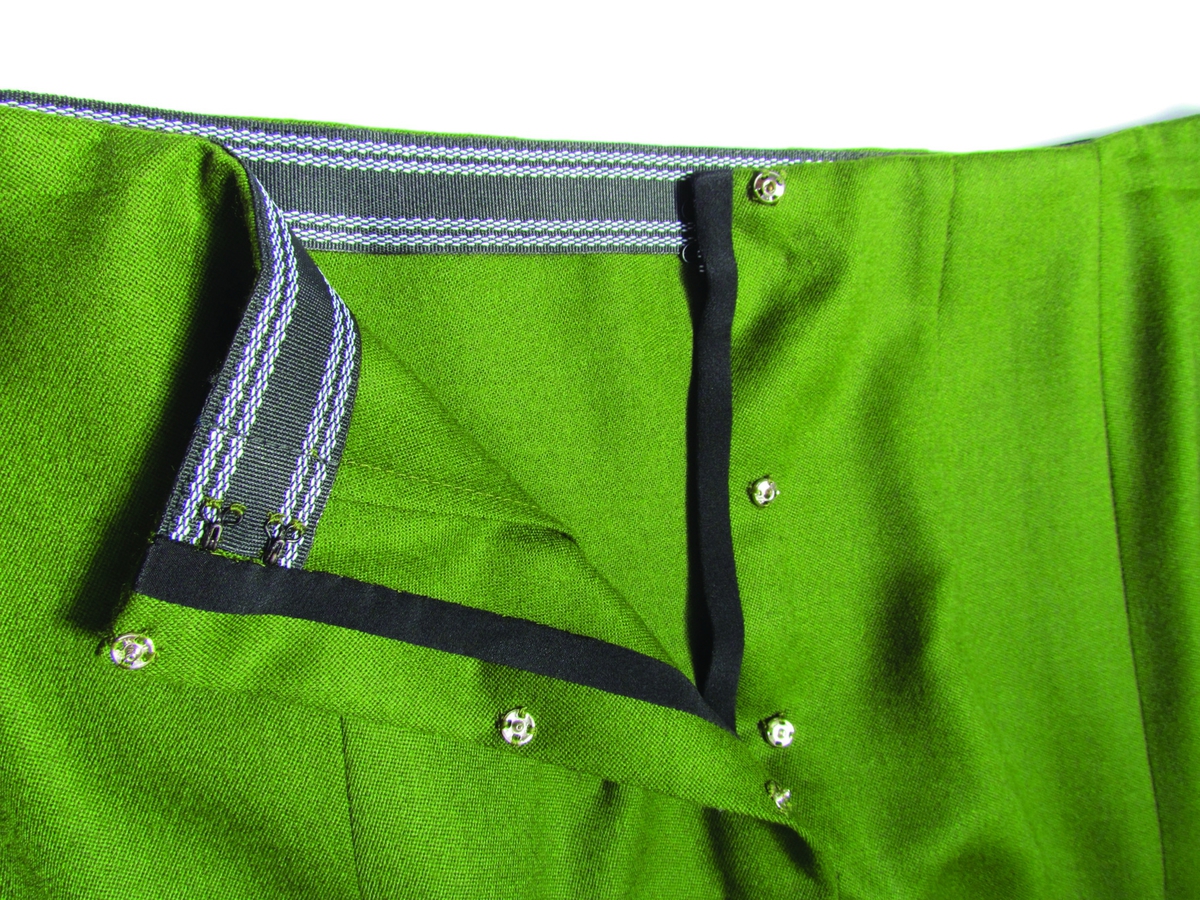
Making the placket in a finer fabric instead of the skirt fabric will reduce the bulk at the closing. Cut two pieces of lining fabric or silk habutai approximately 24cm x 6cm to make the placket. With right sides together,match the raw edge of each placket piece to the raw edge of each side of the center back opening. Using a 5mmseam allowance, machine the placket pieces to the skirt.
Step 15
Press the left side of the opening along the tacked center back line to the wrong side of the skirt. Press the right side to form an underlap.
Step 16


Working on the inside of the skirt, turn the left placket under to leave a 2.5cm wrap. Trim the seam allowance and slip stitch to the skirt. Turn the right placket under, trim the excess seam allowance and slip stitch to the skirt. The bottom of the placket can be trimmed and overcast together. The raw edges at the top will be concealed under the waistband.
Step 17


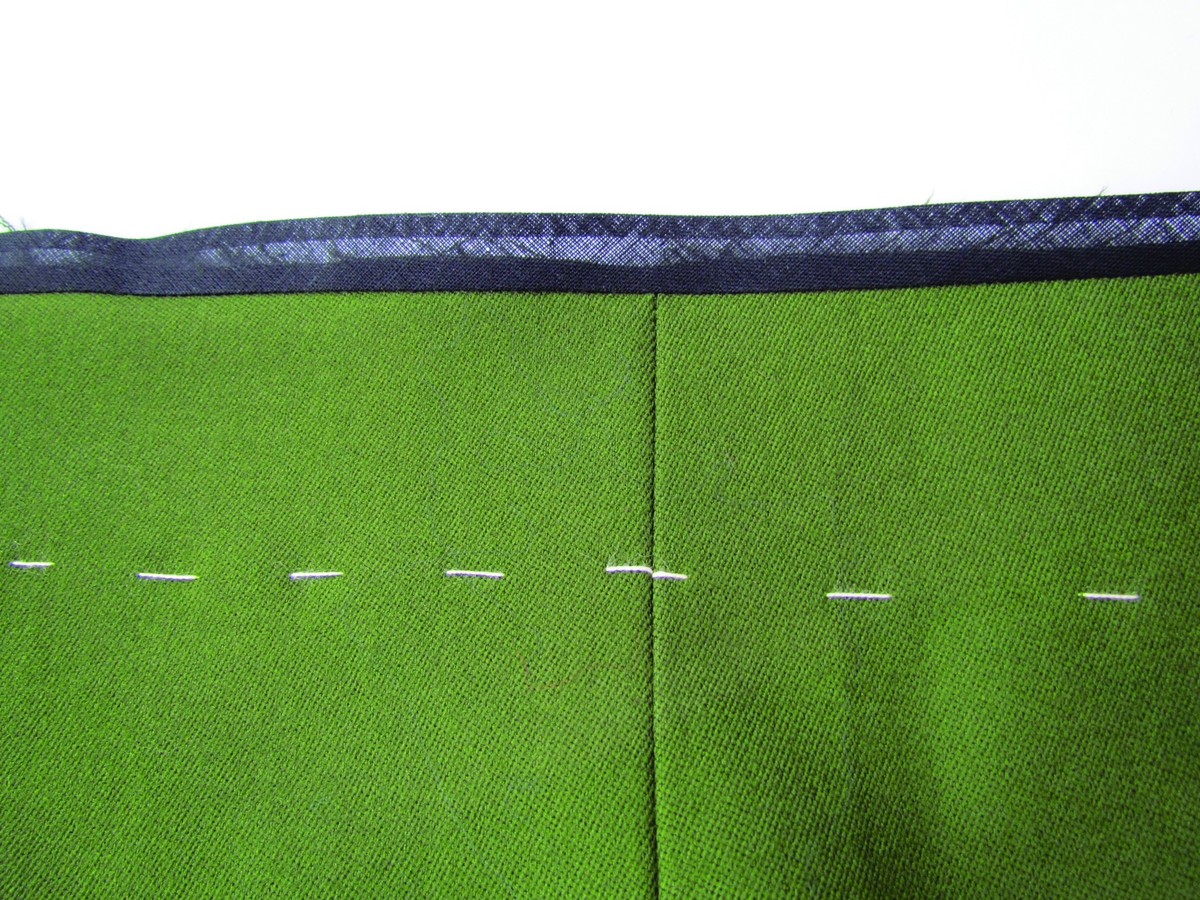
Waistband
Cut a length of Petersham for the waistband that measures the same asthe waistline of your skirt plus 2cmseam allowance at either end. To create a slight curve in the Petersham for a better fit, it can be manipulated by steaming it into shape.
Step 18


Turn each end under 2 cm and top stitch to neaten the raw edges. Place the Petersham wrong side to the right side of the skirt seam allowance, matching the smaller curve to the tacked waistline (the edges of the Petersham should butt together when the skirt is fastened).
Step 19

You will need to fold one end of the bias binding back on itself approximately 1cm, so that you can overlap the other end to conceal the raw edges. Machine stitch inside the first crease line, then press open from the right side.
Step 20


Fold the hem allowance along the tacked hemline and pin the binding to the wrong side of the skirt. You will need to trim horizontally into the seam allowance where the bias binding touches the pleats, to enable the pleats to sit flat.
Tack the hem in place and press along the fold line. Use herringbone stitch to neatly secure the hem. Try to avoid pulling the thread too tightly, as this will show on the outside. Press gently, shrinking the wool with steam as necessary to achieve a flat hem.
Step 21


For particularly bulky fabrics, this method works well and gives a crisp finish to the pleats. The hem needs to be finished before the skirt pieces are stitched together.
Decide on the finished length of the skirt and add 5 cm hem allowance. Apply binding to the raw hem edge of each piece separately. Turn each piece up on the hemline and secure with herringbone stitch. Continue to follow the instructions for constructing the skirt.
Step 22

Fastenings
Evenly space three to four small press studs on the placket and one at the top right corner.
Step 23


Apply using buttonhole stitch for added strength.Attach two small hooks and eyes to the Petersham waistband. The hooks should align with the left edge of the Petersham, while the eyes should sit off the edge of the right side. Remove all tacking and give the skirt a final press and steam.


Responses
(0 comments)